Step | Screenshots | Description |
0 |
| Start Visual Studio using Run as administrator. |
1 | 
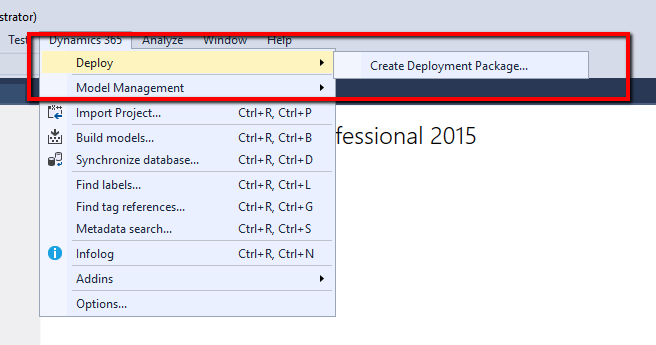
| Click on Dynamics 365 menu and select create deployment package from the deploy menu item |
| 
| Select your model and set the output path of the model and click Okay |
| 
| Login to LCS then navigate to your project. Click on hamburger icon and select Asset Library |
|
|
|
| 
| Select the software deployable package and click on + icon to add your custom package |
| 
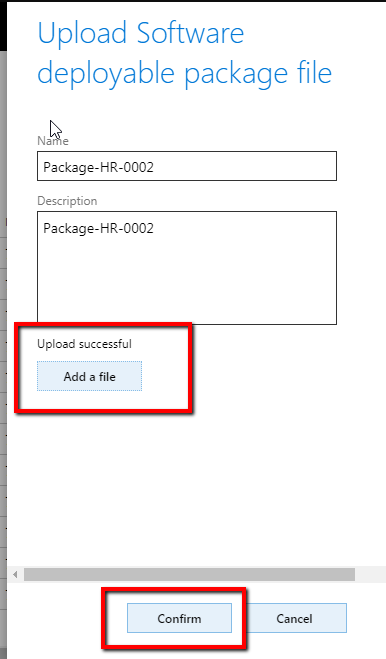
| Enter the package name and description, click on Add file button to upload your deployable package |
| 
| Click on browse and select package then click on upload |
| 
| You can find the package in the tab of software deployable tab Once the package is uploaded successfully.
Once LCS marks the package as valid. |
| 
| Go to your environment.
Now click on Maintain and select apply an update |
| 
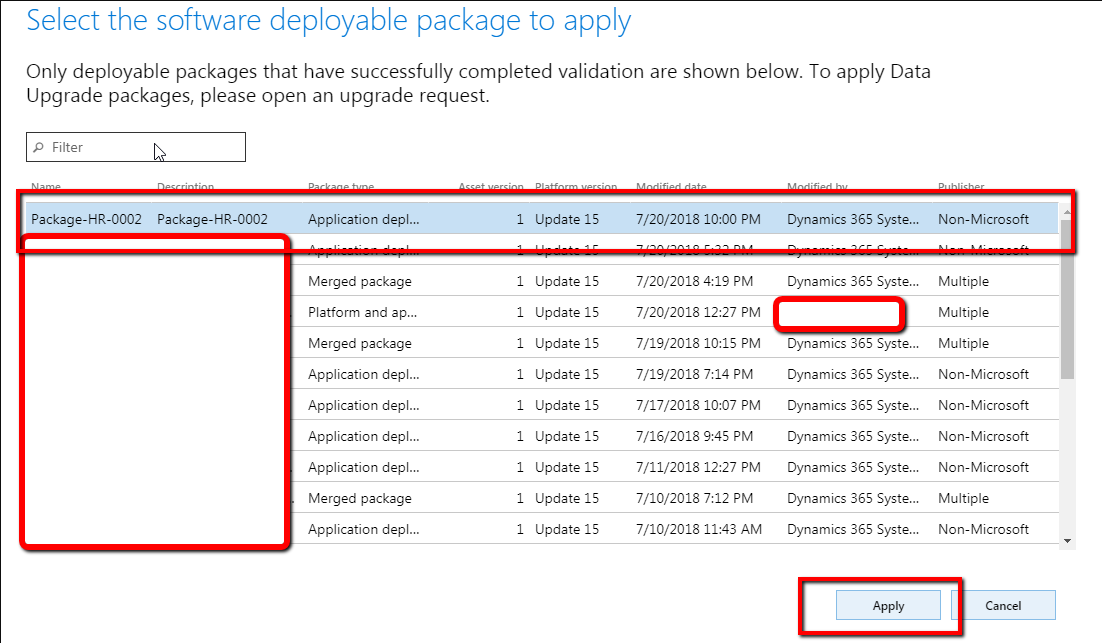
| Select your package and click on apply |
| 
| Package deployment will start in a few seconds. LCS will show you the process of every setup |
| 
| Once the packis age completed sign off the package, so it will visible to you on production deployment as well |
| For Production Enviroment, We need to upload package completed on Tier 1 Enviroment and UAT, then we can upload this package to Production Enviroment. We need to wait 5 hours before the process running |
|


No comments:
Post a Comment